【R】高さプロット
2020年5月25日
1.はじめに
Rのパッケージrayshaderは、地図等の高さ情報を活かし、レイトレーシングやテクスチャリングで2次元、3次元でデータを可視化するパッケージです。非常に強力な機能を持っており、うまく使いこなすとまるで写真のような画像も作り出せます。こちらのページにある例を試してみました。
2.インストール
# To install the latest version from Github:
# install.packages("devtools")
devtools::install_github("tylermorganwall/rayshader")
3.試してみる
3.1 2次元表示
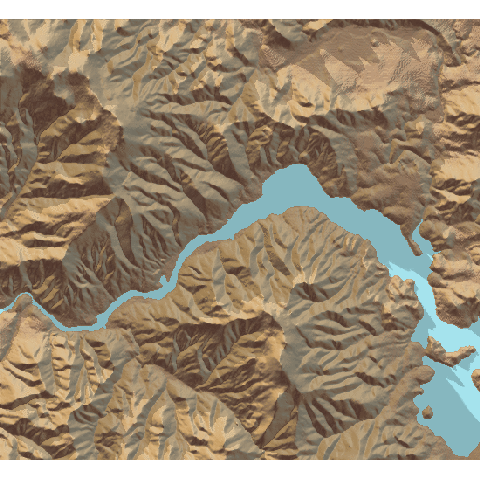
例にある山岳図を2次元で表示してみます。太陽の位置を変えて影を付けたり、高さの強調を変えたり、水に色を付けたりできます。せっかくなので、影の方向を変えながらアニメーションを作ってみました。
library(rayshader)
library(animation)


ani.options(outdir=getwd(), convert = 'C:/Program Files/ImageMagick-7.0.10-Q16/convert.exe')

#Here, I load a map with the raster package.
loadzip = tempfile()
download.file("https://tylermw.com/data/dem_01.tif.zip", loadzip)
localtif = raster::raster(unzip(loadzip, "dem_01.tif"))
unlink(loadzip)

#And convert it to a matrix:
elmat = raster_to_matrix(localtif)

sun_dir <- c(seq(20, 160, by = 20))

replot <- function(){

  for(i in sun_dir){
    #We use another one of rayshader's built-in textures:
    elmat %>%
      sphere_shade(sunangle = i, texture = "desert") %>%
      add_water(detect_water(elmat), color = "desert") %>%
      add_shadow(ray_shade(elmat), 0.5) %>%
      plot_map()

  }

}

saveGIF({replot()}, clean=TRUE, img.name="mountain", movie.name="mountain.gif")
3.2 3次元表示
なんと、3次元でも表示できます。太陽の方角を変えたり、視点を変えたりおもしろいです。ここでは、視点を変えながらアニメーションを作ってみました。
library(rayshader)
library(animation)


ani.options(outdir=getwd(), convert = 'C:/Program Files/ImageMagick-7.0.10-Q16/convert.exe')

#Here, I load a map with the raster package.
loadzip = tempfile()
download.file("https://tylermw.com/data/dem_01.tif.zip", loadzip)
localtif = raster::raster(unzip(loadzip, "dem_01.tif"))
unlink(loadzip)

#And convert it to a matrix:
elmat = raster_to_matrix(localtif)

view_dir <- c(seq(0, 360, by = 30))

replot <- function(){

  for(i in view_dir){
    elmat %>%
      sphere_shade(texture = "desert") %>%
      add_water(detect_water(elmat), color = "desert") %>%
      add_shadow(ray_shade(elmat, zscale = 3), 0.5) %>%
      add_shadow(ambient_shade(elmat), 0) %>%
      plot_3d(elmat, zscale = 10, fov = 0, theta = i, zoom = 0.75, phi = 45, windowsize = c(1000, 800))
    Sys.sleep(0.2)
    render_snapshot()
  }

}

saveGIF({replot()}, clean=TRUE, img.name="mountain_3d", movie.name="mountain_3d.gif")

4.さいごに
こんなことまでRでできるなんて驚きです。